Pro 600 Undermount Slide
To adjust the Pro 600 Undermount Slide, there are a few simple steps!
- Slide the drawer out from the cabinet as far as you can.
- Disengage the locking mechanisms (a gray lever, see upper right side of image).
- Finish pulling the drawer out entirely.
- Locate the adjustment wheels (see orange wheels in image).
- Use adjustment wheels to adjust as necessary by slowly turning them to achieve the desired location. Generally, you will have about 1.5mm of give on any given direction.
- Re-insert the drawer by lining the drawer up with the metal slides on the cabinet, and push the drawer back in until the locking mechanisms audibly click back into place.
- Open and close the drawer several times to ensure adjustments properly aligned the drawer, and repeat steps above if necessary.
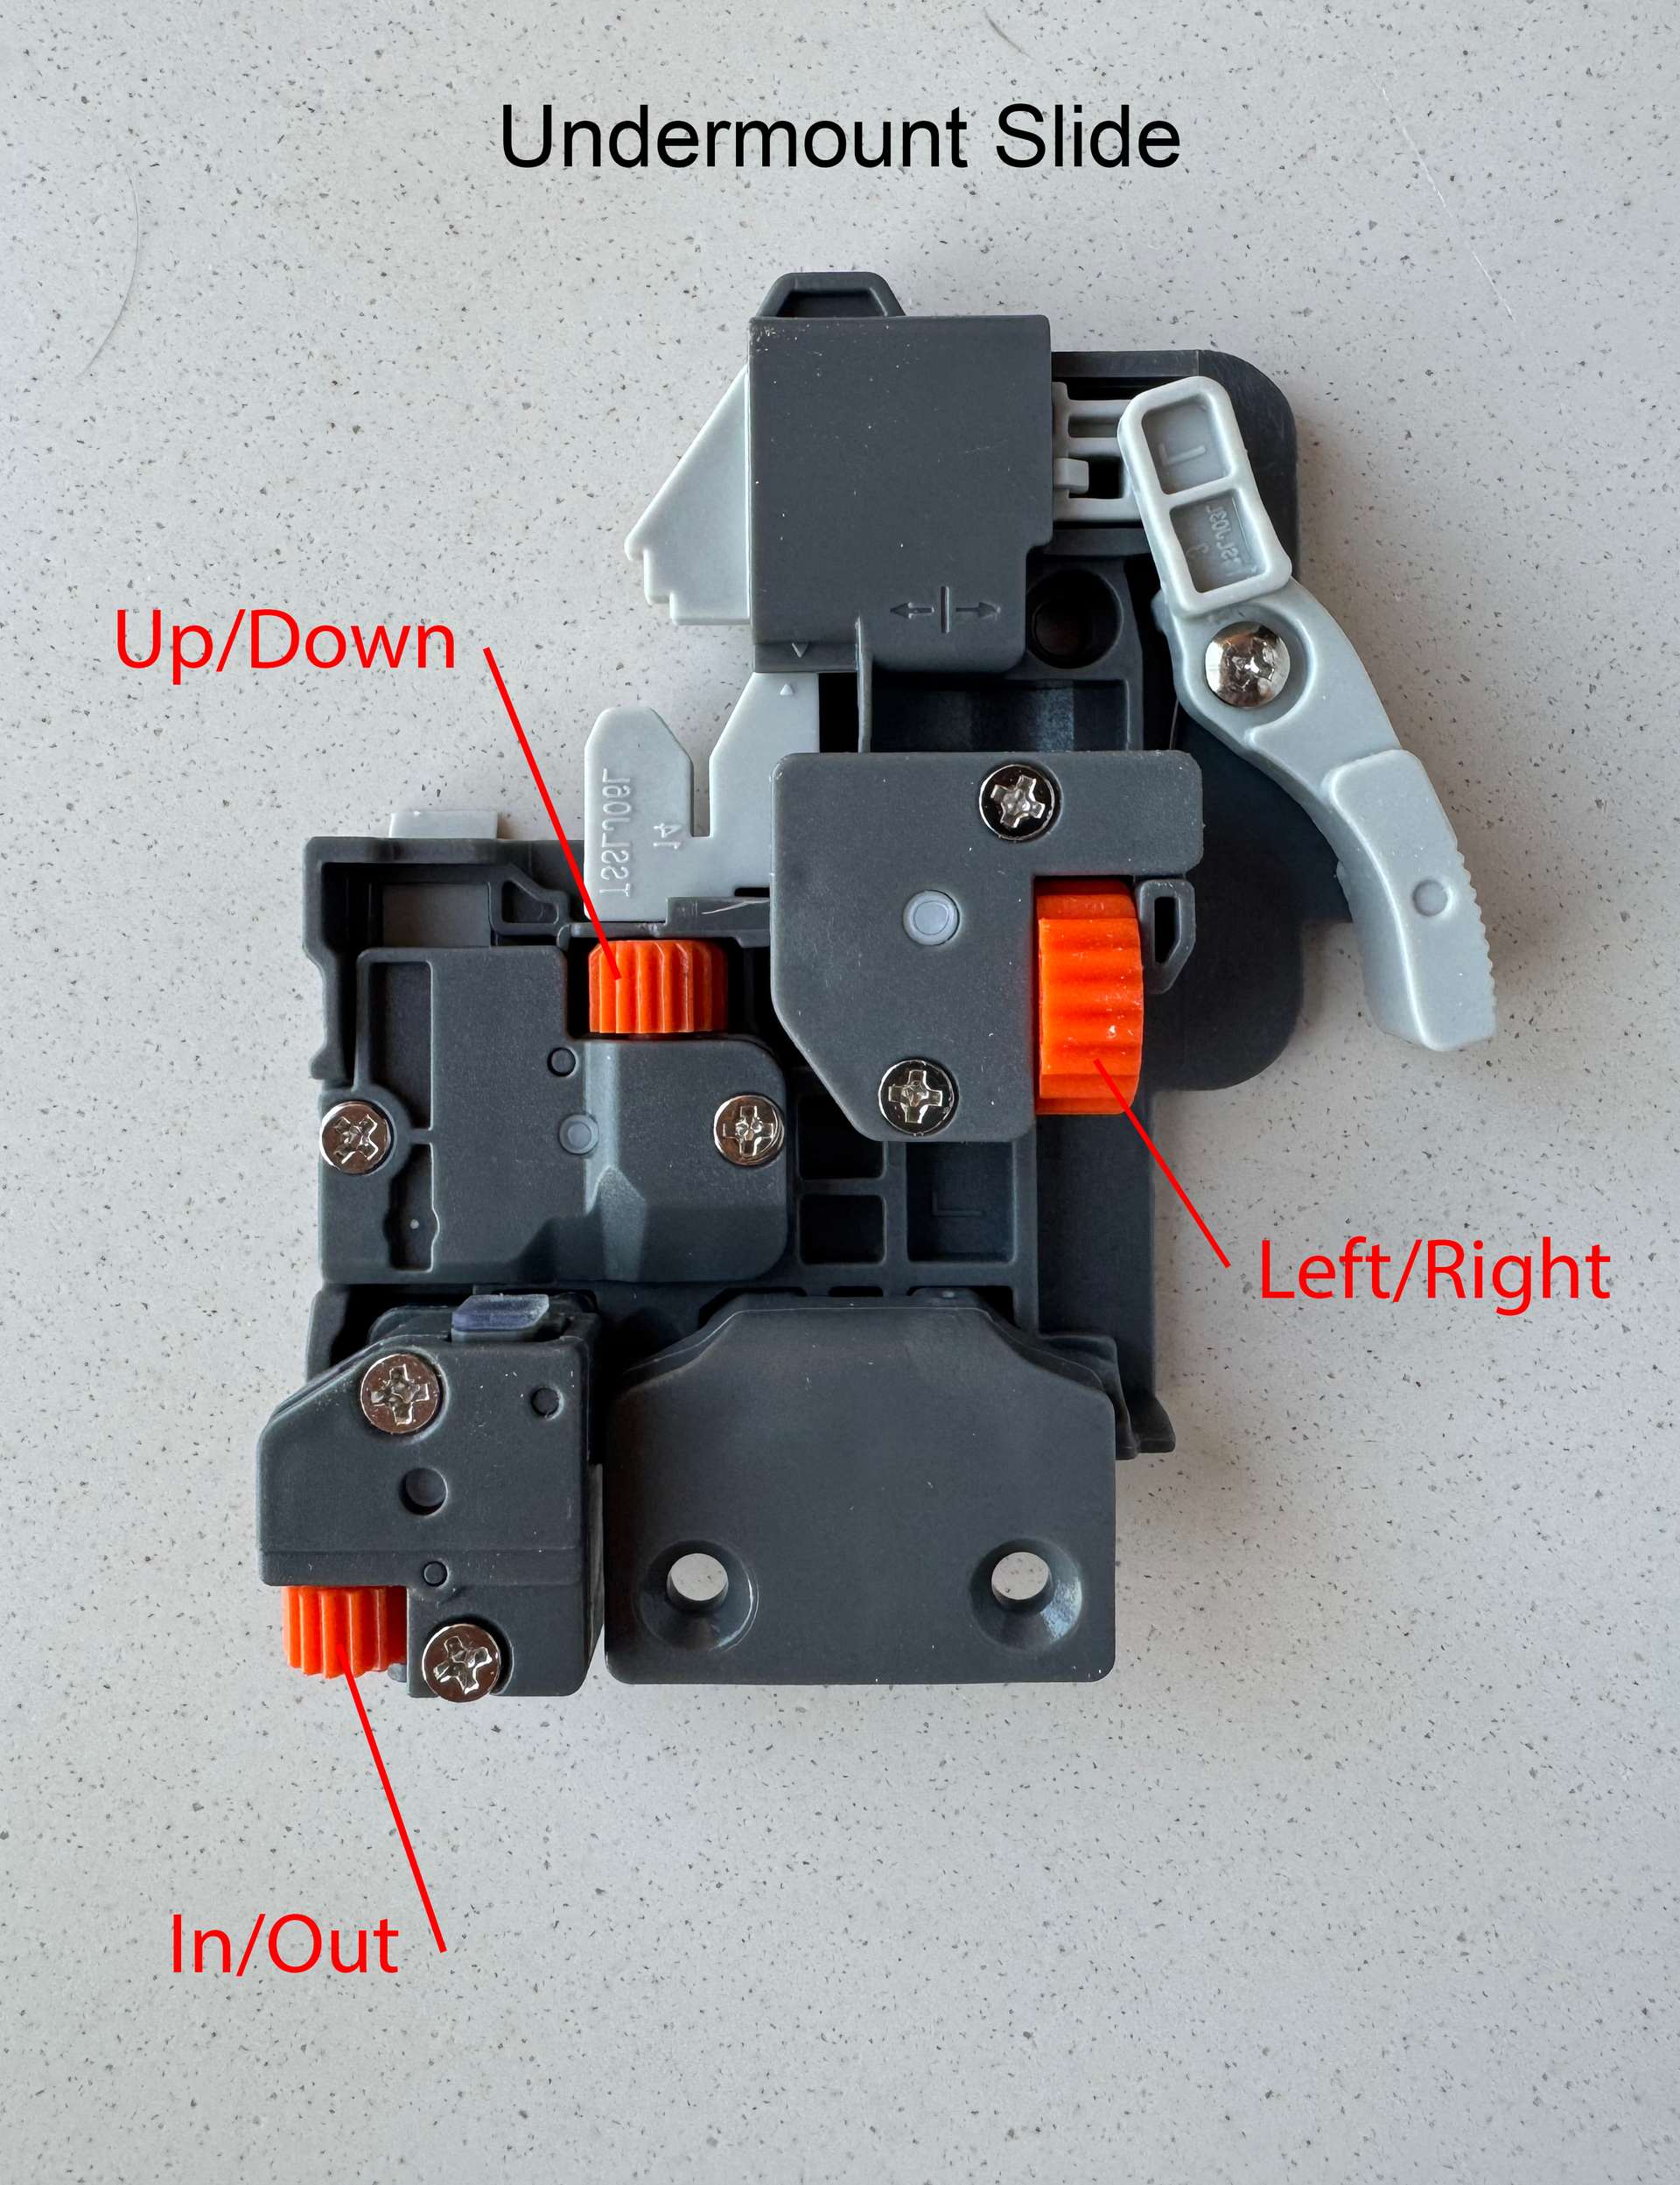
A quick easy explanation of this image: The light gray lever on the side is the locking mechanism that holds the drawer to the rails, the up and down wheel moves the drawer up and down, the left and right wheel shifts it either left or right, and the in and out will control how far the drawer is from the face of the cabinetry.
Salice 700 Series Hinge
To adjust the Salice 700 Hinge, there's a few steps to take.
- Unlike the slides, neither the doors nor the hinges need to be removed, so simply open the door to the full extent.
- Take a look at the image shown here, and using a phillips head screwdriver, carefully and gradually turn the screws to adjust the door.
- There are three ways to adjust the door: Side to side, up and down, and in and out. Each direction in the 3D space one has its own adjustment screw that controls how far the adjustment goes.
- After adjustment, test door alignment by closing the door(s), ensuring an even gap and smooth operation.
- Re-adjust screws as necessary until satisfied.
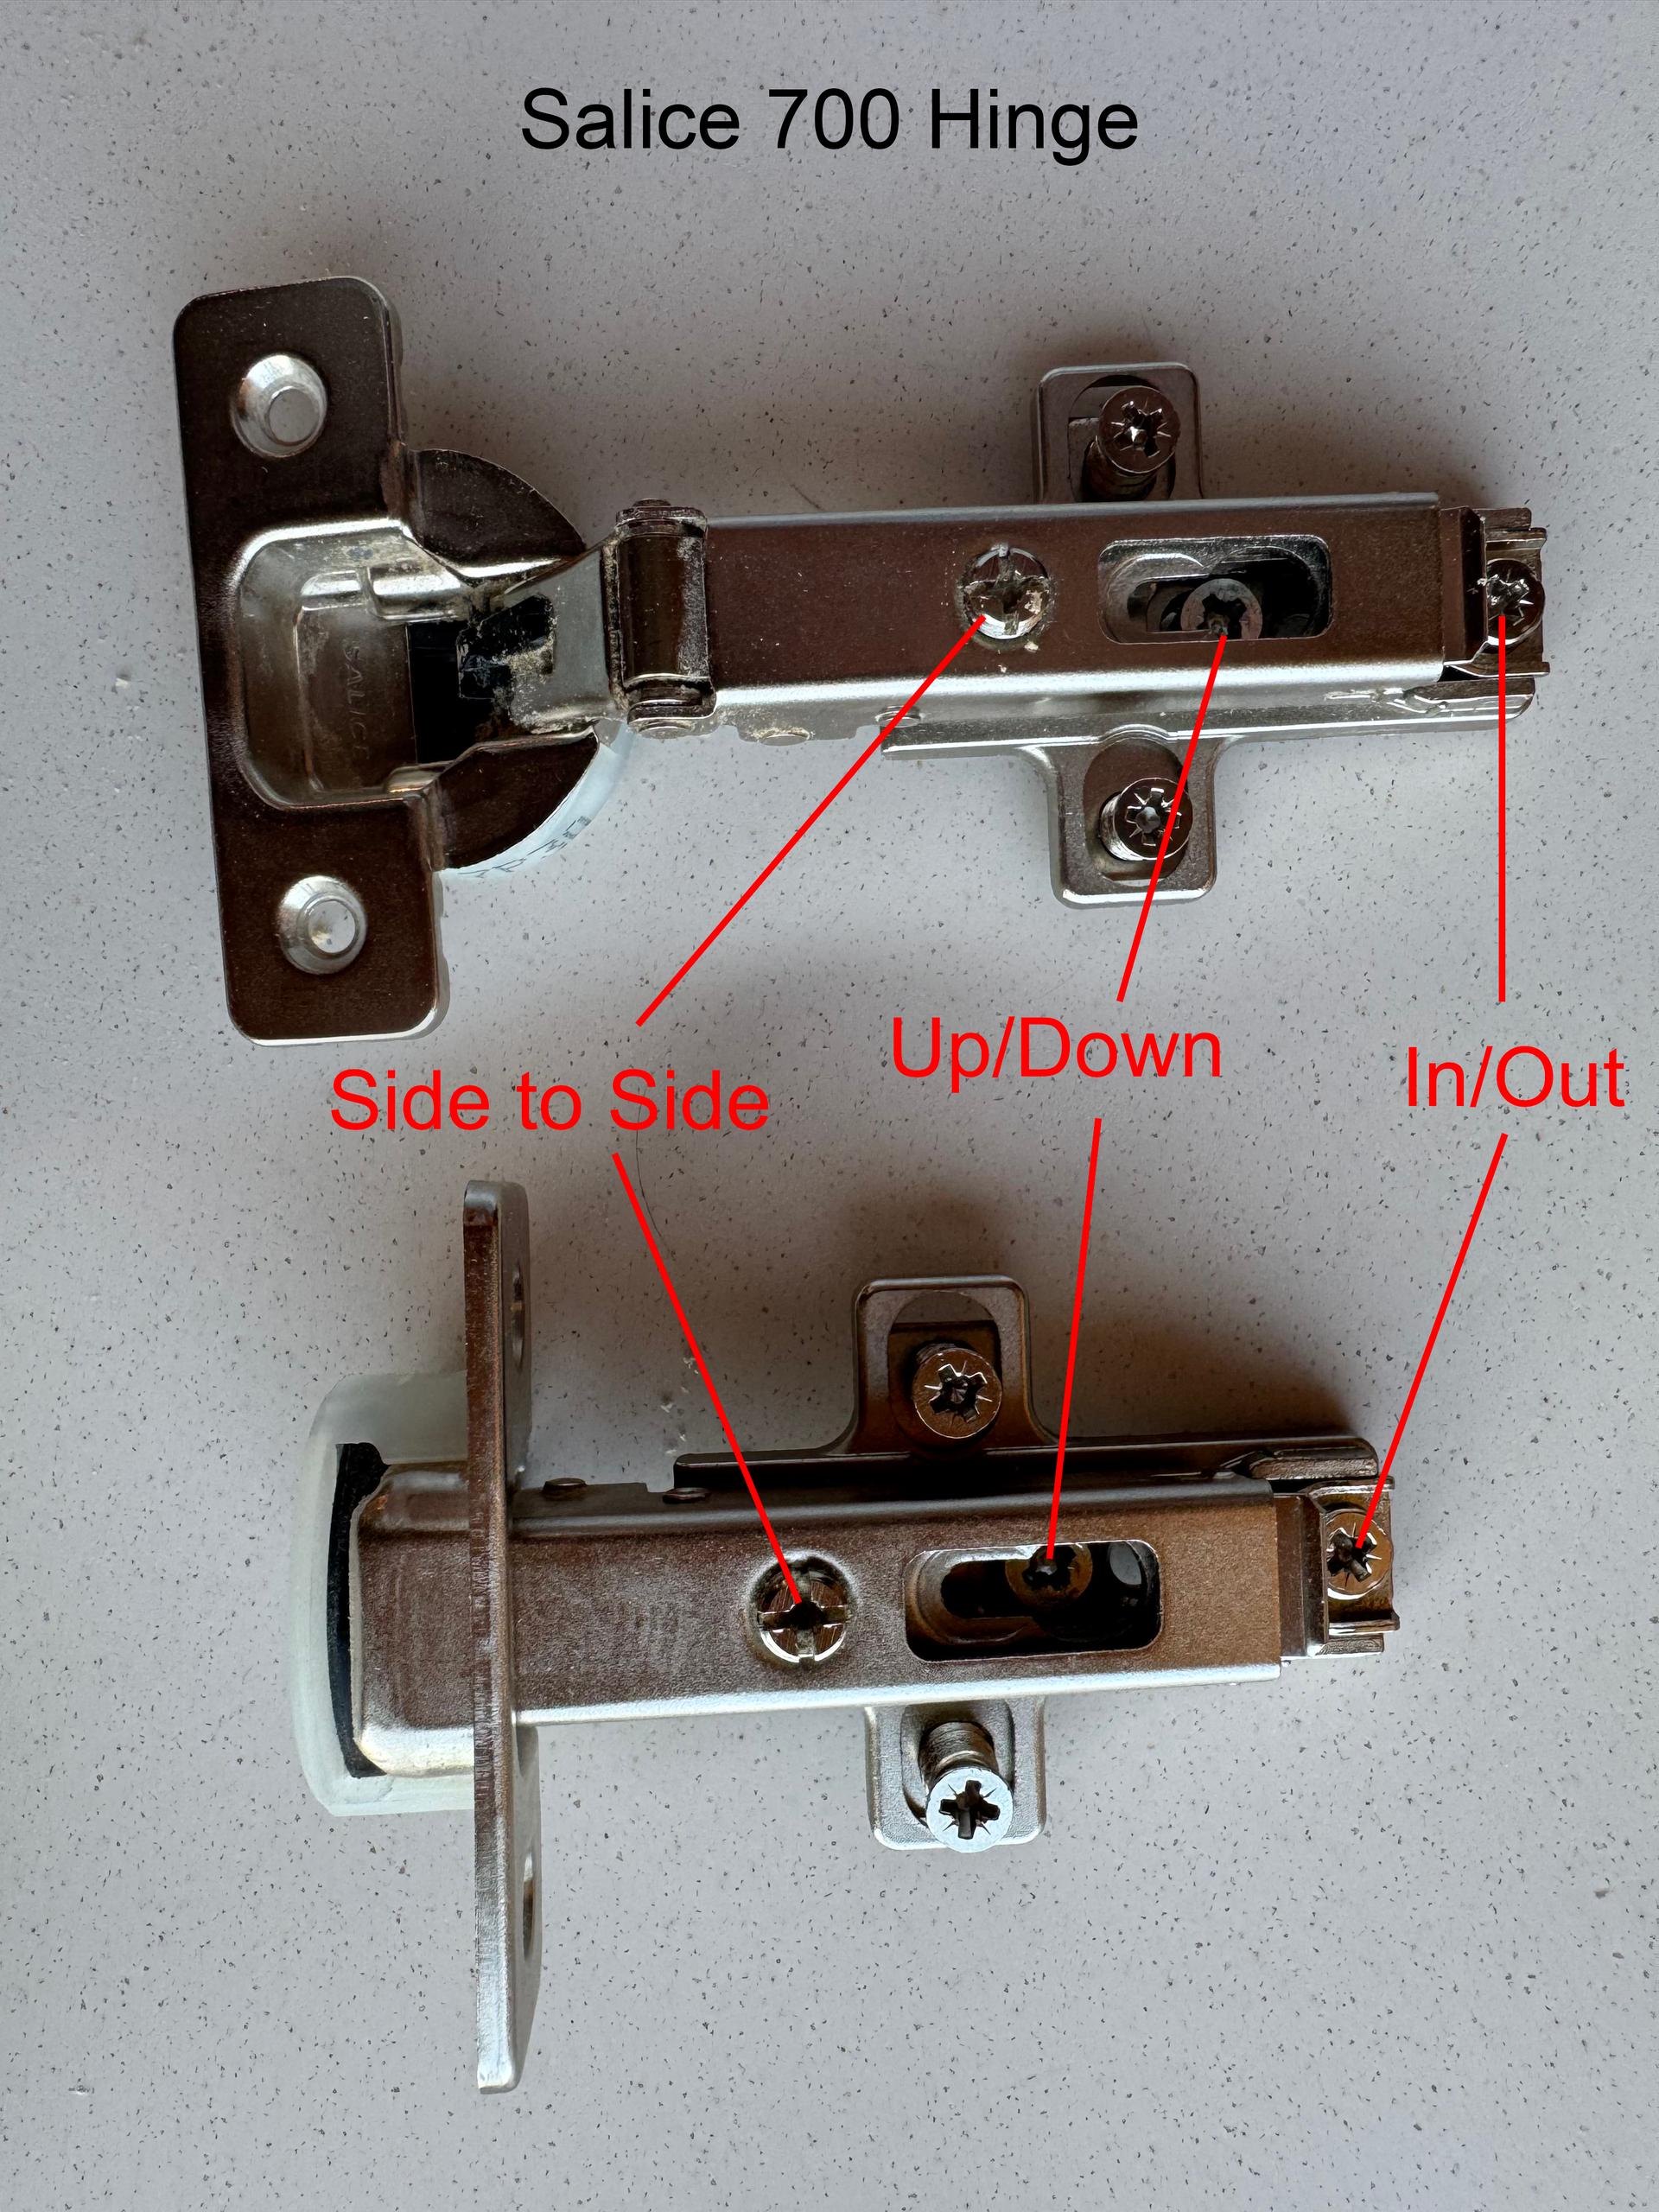
To explain this image a little more, the side to side screw will push the doors closer towards or away from each other, essential for evening out the door gap. The up and down screw will move the door... well, up and down. And the in and out will either bring the door closer or further from the face of the cabinetry.
Some things to note!
While not all hinges and drawer slides are perfectly identical to the ones shown in these examples or in your images, most modern standard hardware we use shares similar adjustment features and functions. The specific screws, dials, or levers may look different or be placed in new locations, but the basic principles, side to side, up and down, and in and out adjustments, remain largely the same. By understanding these core adjustments, you’ll be able to confidently fine tune almost any hinge or slide you encounter, ensuring smooth operation and precise alignment in any cabinet or drawer setup!
Don't be afraid to be the one to adjust your own cabinetry, and if you manage to encounter any serious problems while adjusting, feel free to reach out and we can walk you through the process as well. Happy cabinet adjusting!